This is part two of a three-part post on Rome, Palermo and Vallelunga (Case Vecchie), cobbled together from notes in my travel journal. To read Part One, click here.
Italy Part Two // Palermo, Sferracavallo, Mondello // 1 week

Seeing Sicily for the first time felt like virtual reality – the blues were so blue, the greens were so green, the mountains so immense, primeval and jagged they felt Jurassic. As our plane decended, I stayed glued to the window. There it was, Sicily in the flesh – in all it’s rugged, craggy glory. A place that sits on three tectonic plates and is home to Europe’s two largest active volcanos; an island that has been invaded and inhabited by Phoenicians, Greeks, Arabs, Spaniards, and Normans; a triangular nugget snipped from the tip of Italy’s boot, left to evolve and percolate off-continent.
Like a lot of people before me – and a lot of people to follow – I’d fallen head over heels for this beautiful chimera. Sicily had slain me and I hadn’t even left the tarmack.

—–
Sferracavallo, Palermo
Tuesday, June 14th
8:30pm
This afternoon, the airport shuttle bus dropped me off in a suburb outside Palermo, where I was meant to catch a second bus – the one to that little horseshoe-shaped speck on the map north of Palermo, with the promise of the sea – a town with the lyrical name, Sferracavallo. When I booked my trip, I remember thinking that it might be a bit tricky coordinating transit from Palermo centre to this small, sparsely-populated (read: off-the-beaten path) fishing village by the water. My concerns were confirmed once I found myself standing on that dusty meridian outside Palermo, in the middle of a deserted boulevard, far, far away from home.
Palermitan bus schedules – posted on large boards high above each bus stop – aren’t the easiest to decipher; to the uninitiated, they are a complete and utter nightmare. There was no conceivable way of knowing if I was on the right side of the road, or whether I was heading east, north, south or west, or if I’d been blown away by a tornado in Kansas and dumped somewhere along the yellow brick road. (sidenote: while most people travel with data on their phone to help them get around, I don’t. It’s a symptom of having a frugal octogenarian living in my brain. I promise to catch up soon.)
I wandered around for a bit, rolling my bulky suitcase over cracked sidewalks and nubby curbs, in search of a tabacchi where I could buy a bus ticket and possibly get directions – ones that would be more accurate than, say, sticking a wet finger into the wind. A couple passing by told me there was a ticket counter in the piazza, pointing to a large roundabout in the distance, with a tuft of palm trees sticking out of the middle. It was so far and hot, the trees were surrounded by wobbly mirage lines. I looked down at my suitcase, which looked more worse for wear than I did, wondering if I should just shell out for a cab. Just one more ticket. One more bus. Almost there. The ticket vendor directed me to the correct stop, a whole three blocks away from where the shuttle dropped me off, and on the other side of the road.
I waited a long time for that second bus – maybe 45 minutes – but it came, and I got on; I was so tired, I barely noticed the gum I stepped in and the cockroaches crawling around my luggage. A young mother and her two girls got on soon after me. One of them – the youngest of the two – stood facing me and started to stare. Not in a coy or curious way, as sometimes young kids are prone to do, but rather in this unflinching, scowling way, with a toughness I couldn’t quite place. She stared like this for a good couple of minutes. I pretended to ignore her. At some point she nudged her sister, glanced down at my mid-section and said to her quietly, “Ha una borsa la.” (“she’s got a purse there”, referring to my chic, beige, slightly sweat-damp waist wallet). We locked eyes and I inched forward, “Come stai, ragazza? Bene?“, making sure she understood that I understood, whatever her intentions might be, malicious or not. I’ll risk being perceived as a weirdo over having my fanny pack stolen on sweaty bus. The look on her face shifted from tough to stunned as her gaze dropped to the floor. The three of them got off at the next stop.
That’s when I met Roberto, the macellaio – an older man from Isola delle femmine with kind eyes and suspenders who said that my Italian was “proprio buono“. We chatted for a bit and at some point I admitted to him that I wasn’t sure where I was supposed to get off. “Non te preoccupare, te lo dico io“. I was glad to have him there, like a spry version of my grandfather, telling me where I needed to go. A couple of stops before mine, he mentioned that he worked in nearby Mondello, as a butcher, and that if I happened to make the trip out, that I should come and see him. I took down some notes – Mondello, Roberto, macelleria, near la sirena (the mermaid), open on Saturdays. Visiting him seemed like a long-shot, but part of me really liked the idea. I pocketed the notes and stepped off the bus, waving him goodbye from the sidewalk.
—–
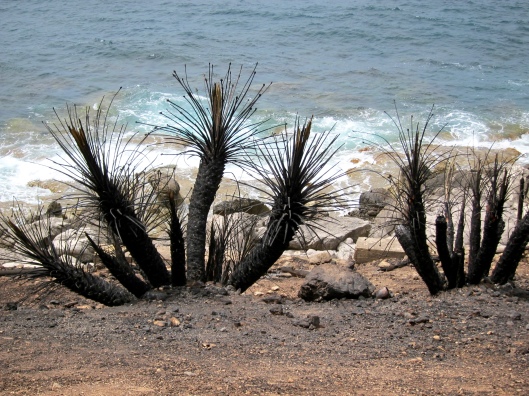
With my suitcase safely deposited at my apartment rental, I headed down to the water to sit on the rocks and watch the sun slowly dip down below the horizon. It took me a train, a plane, two buses and a lot of broken Italian to get here. But I’m here – in Sferracavallo – that miniscule seaside town on the edge of the Tyrrhenian Sea, sandwiched between a natural reserve and a craggy mountainside. The shore is populated with what look like pastel dollhouses, frozen in time. It smells of salt and seaweed, summer and infinity.
This is what you take a train, a plane and two buses for – a landscape so beautiful it sucks the air straight out of your lungs. It’s at this point you can pause, take a deep breath and know that it was worth every bloody step.


—–
Sferracavallo, Palermo
Wednesday, June 15th
8:50am
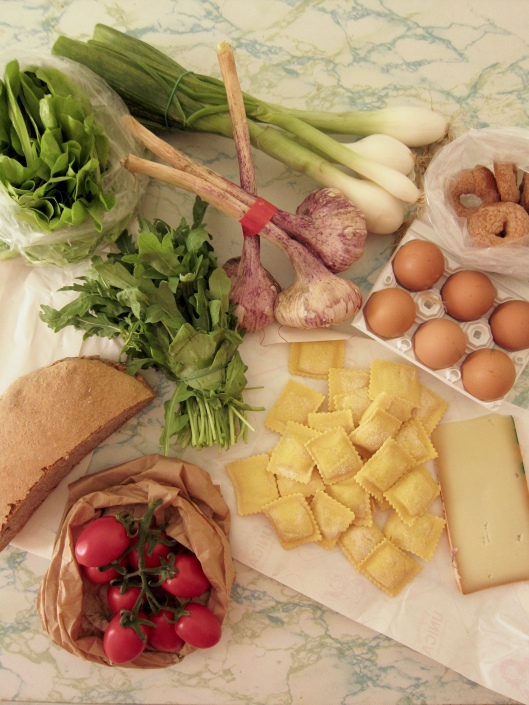
Sferracavallo only has one supermarket – a dusky little place with two aisles and a lot of vacant shelf space, with a charcuterie counter at the back, rows of sunscreen at the front, and one sullen cashier manning the checkout with her no-bullshit, frosty gaze. The thing is, even in dingy little supermarkets, in tiny nowhere towns, you can still find grocery gold – palm-sized balls of mozzarella for 50 cents; fresh ricotta spooned into parchment paper and sold by weight; long, thin slices of prosciutto cotto; yogurts with interesting flavour combinations (hazelnut/fig is brilliant), not to mention a selection of totally acceptable table wine for under 5 euros a bottle.
At the cash register, a woman noticed the bottle of San Benedetto iced tea that I’d plunked onto the conveyor belt. “È buono questo. Lo comprato anch’io”, pointing to the stash of iced tea bottles in her cart. She tells me that she sometimes makes iced tea at home from scratch – black tea, lemon juice, un po di zucchero – hinting that her decision to get the store-bought stuff usually depends on how much is in the bank account. We start talking a little about the increase in food prices and the economic difficulties in Italy, and more specifically Sicily. My Italian is rusty and stunted in dialect, but we seem to understand eachother. At some point she mentions arrangiarsi, or the ability to “arrange oneself”, to manage, to get by with what you have (in French, se débrouiller). We talk about how cooking at home is such an important part of arrangiarsi, as an expression of self-reliance and self-sufficiency.
As we talk, I think about the exorbitant 18 euros I spent on restaurant ravioli last night, at one of the few places in town whose entrance is plastered in Trip Advisor stickers. My stomach sinks a little just thinking about it. Apprehensive of making the same mistake today for lunch, I turn to the idea of arrangiarsi. Before the woman leaves with her groceries, I ask her if there’s a produce vendor in town. I follow her outside the store, where she points down the street, “dritto e poi a destra“.
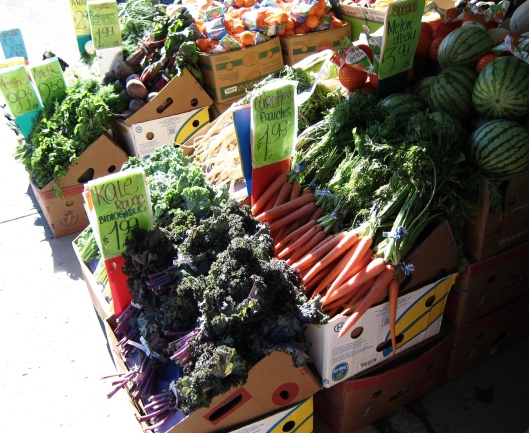
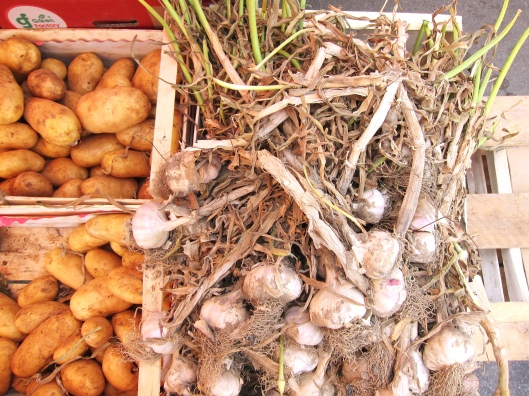
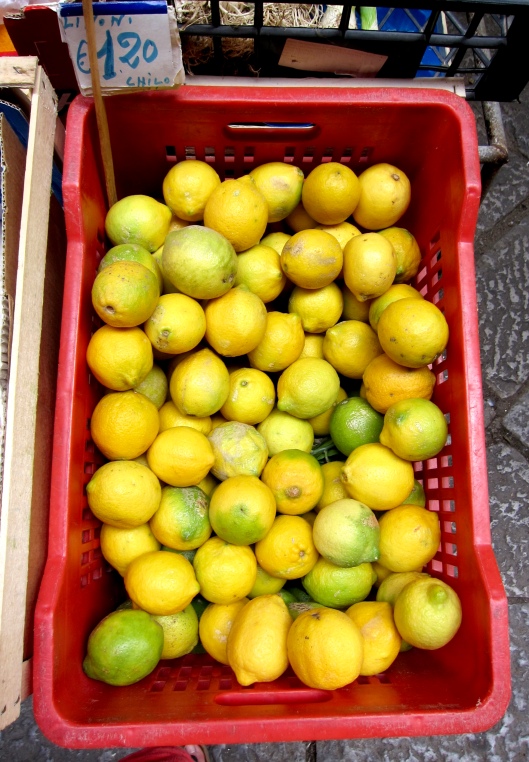
There, under the shade of big, colourful awnings, are a series of fruit and vegetable stands. Vendors call out to customers and stride back and forth behind rows of wooden crates stacked with Sicilian produce – broad beans, peaches, vine-ripened tomatoes, eggplant, fresh garlic, onion and basil. It’s my first time encountering fragolini, delicate, wild strawberries that have centres closer to ripe, mashed banana. Then there is the mammoth cucuzza, a mild, Sicilian zucchini, grown several feet long, along with their silky, tender leaves called tenumeri, often used in soups. After selecting a few things, including a big bunch of basil that I haggled down from 1.50€ (astronomical, aka “tourist price”) to 0.50€ (closer to the norm), I ask the vendor for some garlic. He brings me a whole braid, with about ten bulbs on it. I laugh, “Oh no…solo uno per favore“, explaining that I’m only here for a few days. He says they don’t normally sell them a l’unità, but then shrugs and snaps ones off from the braid, tossing it into my bag. When I offer to pay him for it, but he shoos away my offer, “Va bene, signorina“.
Market freebies like this one are more or less common around Italy; I imagine they help vendors build a regular client base. It’s a simple, somewhat Pavlovian technique, but it works; I visited his stand every day after that, and every day something was tossed in at no cost.


Across the street from the produce stands is the Swordfish Man, who, I am told, arrives every morning with a new haul. It’s a fairly basic operation – a stainless steel counter, a cutting board, a cleaver, some fresh water and ice. You tell him how much you need – in grams, or for how many people – and he slices off slabs, eyeballing the requested amount. He sells a few other items, including bright scarlet gamberi rossi (Sicilian red shrimp) and some small fish with iridescent skin, but it’s the swordfish you really come for. As he prepares my order, I ask two women beside me how they usually prepare theirs. One of them says, “Solo olio, sale, e un po’ di pepe. Nient’altro”. She lowers her glasses and raises an cautionary finger when she says it. In other words, do not mess with the fish. Keep it simple. Capisce?


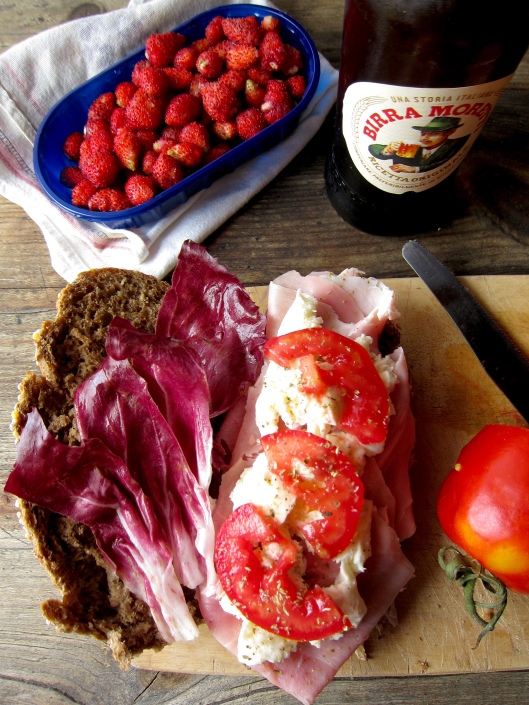
I return to the apartment with my spoils, feeling gratified and happy to be back in the kitchen, making my own meals. Over the next few days, I make my way through the different bits and bobs I picked up at the market. The peaches, added in slices to a picnic sandwich of prosciutto cotto, basil and mozzarella, are so fragrant and ripe they melt in your mouth; the tomatoes, sliced thin and seasoned with salt and Sicilian oregano are so flavourful they pinch the insides of my cheeks; the ricotta, smooth, cool and cloud-like, collapse gently on spoonfuls of warm minestra.
And the swordfish, well, the swordfish made me weep. Like, actually weep. I sat at the table, fork in hand, my eyes welling up with hot, fat tears, stunned at how something so simple, so seemingly innocuous, could trigger such a deep-seated feeling of unadulterated joy. It’s the kind of food that reaches into your chest, squeezes your heart and in some magical, unspoken way, changes you.


—-
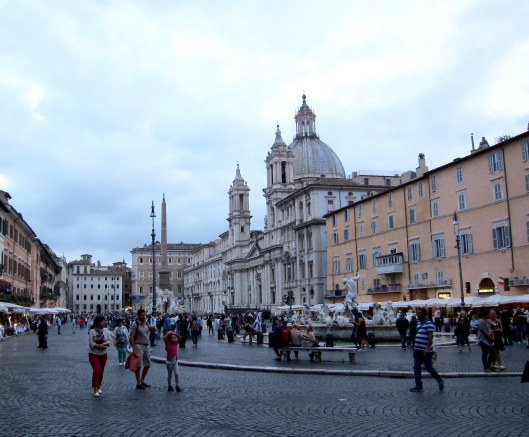
Palermo, City Centre – day trip
Thursday, June 16th
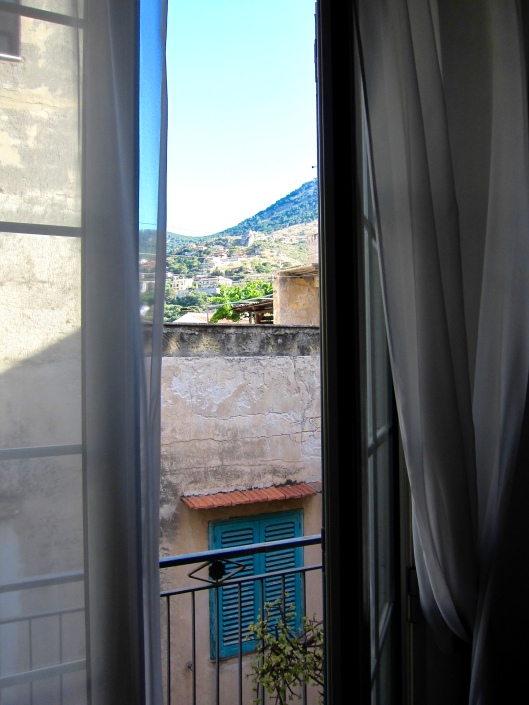
It’s hotter than stink today. 45 degrees in the shade. When I opened the window early this morning, expecting a fresh gust of cool air, a blast of scorching air greeted me instead. It was only 8am. Had Mount Etna blown? Or was this the beginning of the apocalypse? Groggy and confused, I failed to find a reasonable explanation beyond those two.
A short time after, my host, Giusy (pronounced “Juicy”, short for Giuseppina) said, “C’è proprio un’fuoco oggi“. I thought she meant, quite literally, that there had been a fire. That makes sense, I thought. I asked where the fire was. “Ah, no – è solo un espressione, quando fa molto caldo.” So there’s no fire. It’s just an expression. In other words, we’re going to be on fire today. This also happens to be the one day I chose to visit the city centre, on foot, without reprieve of the sea or the occasional cold shower. Brilliant.
10:30am
I catch the first of two buses to Palermo centre. It’s packed to the gills; we’re a mound of sweaty, lethargic commuters, trying our best not to come into physical contact with one another, but failing miserably. About ten minutes in, a ticket agent steps on, requesting to see proof of validation from all passengers, one by one. He quickly gets into an impassioned argument with an old man standing next to me. Did he touch someone inappropriately? Did he steal something? No, the problem is he doesn’t have a ticket. A minute later, the ticket agent’s wrath is directed at a second passenger – a woman – who he also discovers is ticket-less. With a voice tht fills the whole bus, he tells them they’re thieves; he threatens to take their pictures and report them to the authorities. It’s a mess of words, of shouting, of veins protruding from necks. At the next stop, he orders them off the bus. They oblige, begrudgingly, telling him he’s a monster for forcing them off the bus in this heat. Once they’re off the bus, he catches my gaze; his face is now suddenly calm, the blood flowing back down from his temples and neck. He shugs, and with both hands cupped together in prayer pose, asks rhetorically – “Ma che posso fare? E il mio lavoro“. I’m not quite sure why I become the confessional, but I nod sympathetically before turning my head to the window, heart pounding, hoping in vain to catch a cool breeze.
—-
In Palermo I’m meeting a friend of a friend, a Palermitana named Fabrizia, who occasionally takes friends on food tours of the city. Of specific interest to her is Palermo’s street food, which you can often find in and around the city’s outdoor markets. In a string of online messages in the days preceding my visit, she asked me if I had any aversions or allergies, to which I answered an excited “Nope! [smiley-face emoticon]. I’ll try anything”. I knew that this would leave me open to a Pandora’s box of eclectic delights, many of which I’d never had before and most of which incorporated scraps, leftovers, rifuti from the butchering process. In other words, the bits that would normally be thrown away. I was curious about the different kinds of Palermitan street food, and I felt lucky to have Fabrizia – someone so well-versed on the subject – leading the way.
Our first stop is the Capo market – a narrow, winding alley flanked by vendors on each side. As we enter, Fabrizia points out the local specialty “babbalucci” – tiny, translucent snails in stripy, cream-coloured shells. Stacked high in sturdy crates, they look like piles of ornamental seashells (that is, until you spot the few that are wriggling around). Fabrizia says that to cook them, they’re normally tossed into a fry pan with olive oil, slivers of garlic and chopped parsley. The vendor doesn’t have any ready to eat, so we continue to meander down the alley, slowly squeezing between old ladies and pushy scooter drivers – not unlike the mound of babbalucci trying to squirm around eachother.

Soon after, we come to a cart on wheels with a heavily concealed wicker basket placed on top, draped in layers of cloth. “This is frittola“, Fabrizia tells me. “You know frittola?“. “The stuff leftover from the calves’ slaughter, right? Cooked in lard?”. “Exactly“, she says. The dishtowels are to retain the heat of the frittola, but I’ve heard that it’s also part of the tradition of shrouding the whole thing in mystery; Fabrizia confirms this, “Yeah…you never really know what you’re going to get. It’s a surprise every time.”
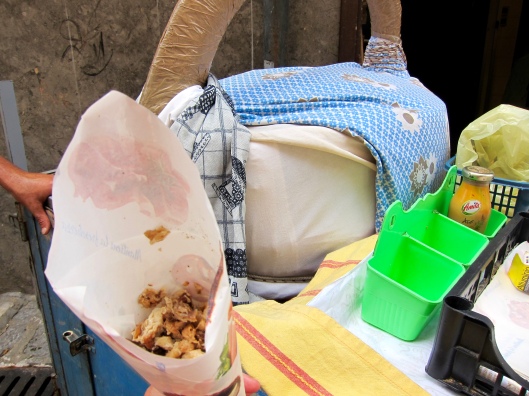
We order a serving. The vendor smiles, bearing gaps in the places where his molars should be, the corners of his eyes crinkling. I can tell he’s eager to see me try it. He rolls up a strip of waxy charcuterie paper into a cone shape, then plunges his hand deep into the mystery basket. He mixes it together a little, then pulls out a handful of gnarly bits – toasty in colour, heady with fat. We add a squeeze of lemon, some salt and dig in. Some pieces are squishy, some are crispy. They all have the same deep-fried flavour, thanks to the lard; the taste is close to roasted chicken skin, but its texture is closer to tripe. Or maybe aorta?After a few bites, I’ve reached my limit. Fat saturation comes quickly with this kind of street food, which – unless you’re a construction worker – is best in small doses.


photo by Giulia Oddo
A little further along, we stop at two little shops – one that sells minestra with tenerumi, deep-fried potato croquettes with chopped mint (crocchè), thin chickpea-flour fritters (panelle), fish croquettes, and a salad with the fresh anchovies, marinated in oil and vinegar; the other, a piatto misto with sweet and sour caponata, fava beans, string beans, potatoes and chopped tomatoes – all of it scooped up with chunks of bread. For good measure, we also ordered the sfincione, a deep-dish Sicilian pizza, this one garnished with oregano and anchovies.


photo by Fabrizia Agnello
There’s one more thing just outside the Capo market that Fabrizia wants me to try. “Have you heard of musso?“, she asks. I had, but only because I did a bit of online research before coming to meet her. “It’s either pork snout or cow muzzle, right?” She nods her head and tells me there’s a man nearby that has a stand entirely dedicated to cow parts – utter, cartilage, bull penis, and, of course, musso. His products are laid out plainly on thick blocks of ice, ready to be carved and doled out to customers. Fabrizia orders some musso for us. “Un pezzo carnoso, per favore.” She specifies wanting the meatier piece without cartilage. The vendor is a man of few words; the only thing that slips out of his mouth is a sullen critique of what we’ve ordered. “Vi state perdendo la parte più saporita“, he cautions in a gravelly voice. Apparently we’ve chosen the less flavourful part. He prepares it for us, almost begrudgingly, laying thick slices of musso on a piece of parchment paper.
The flavour reminds me a little of roast beef, if roast beef were boiled and icy cold. It’s a nice counterpart to all the grease-laden (albeit tasty) bits of street food we’ve picked at throughout the market. The meat is chewy, cool, neutral tasting, and dare I say, a little like a palate cleanser.


A little futher along our walk comes Mercato di Ballarò, equally well-stocked with fresh produce piled high, different types of fresh and preserved fish, various incarnations of sheep and cow-milk cheeses (the baked ricotta was perhaps my favourite), as well souk-like stands with their myriad displays of nuts and spices. The offer of street food continues, with fried rings of calimari, stuffed whole squid, and bite-sized sardine saltimbocca, rolled up and fastened with toothpicks. In several spots, there are vats of boiled corn on the cob, potatoes and artichokes (carciofi), ready to eat. Everything before us – from the prepared food, to the squat Saturn peaches and fresh, fuzzy-skinned almonds – is astonishingly inexpensive. At least by North American standards.
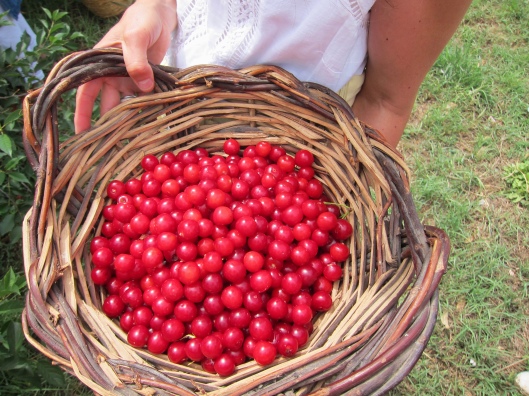
I still can’t believe that whole basket of plums was one Euro.


It’s at Ballarò that I end up having my first taste of babbalucci. After asking for a sample, the vendor plucks one from the pile and hands it to me, its shell slicked in oil. These are not French escargot. There are no dainty two-pronged forks to extract them with; no crispy breadcrumbs adorning the top. These are babbalucci, my friend. No-nonsense food that you lift to your lips and suck out the shell in one go. They’re chewy, as you might expect, but not in an unplesant way – a little like cooked calamari. They’re also very delicious. The mixture of warm olive oil, sautéed garlic and parsley remind me of my Nonna’s pasta aglio e olio. Even minutes after we’d left the stand, I kept turning to Fabrizia, “Those were good. I mean, really good”. It’s extra special it is when something completely unexpected lights up your tastebuds like that. It’s exciting. I never thought that sautéed snails would be capstone of my Sicilian street food experience, but there it was – one of the world’s simplest, most modest foods – securing a place along some of my best food memories. Who knew.
—–
By the time we reach the third spot – Mercato Vucciria – the market day was winding down. Many of the vendors had closed up shop and the customers had returned home. “They’re going to re-open again tonight, for the night market.“, Fabrizia points out. Oh, right. The night market. In the little that I’d read about it, the Palermitan night market sounded mythical – late-night browsing, beers, more street food, like those spleen sandwiches (milza) cooked in lard and sprinkled with wispy bits of shredded cheese, or spit-roasted delicacies like stigghiola (lamb or calf intestines), dressed with a quick squeeze of lemon. I’m regretful not to be staying in the city centre that night, but am also looking forward to escaping the heat by heading back to Sferracavallo, that little safe haven of cool salty breezes, where the daily commotion is limited to church bells, seagulls, and the occasional motorino.


Fabrizia accompanies me back the the square where I’m to take the first bus home. On the way, we bump into one of her friends who says she’s been waiting for an hour for the bus. Apparently, some of the city’s bus drivers have refused to go to work because of the heat. This bodes well. It’s early afternoon and the air has gotten thicker and even more oppressive; the sun beats down hard, making my exposed forearms feel like they’re sizzling. There are strong gusts of wind, but they’re thick, not refreshing, hitting you like a wall. The sound of ambulance sirens can be heard throughout the day. There’s a man across the street lying listless on a bench, being fanned by his friend as paramedics arrive. At different points in the day, I’ve been told – by Giusy, vendors, Fabrizia – that even for Palermo, this kind of heat isn’t normal.
Mercifully, the first bus comes shortly after I arrive at the stop. As I wait for the second bus outside Palermo centre – the one I would eventually wait nearly two hours for – I see in the distance that a piece of Monte Pellegrino is burning. Later that evening, on the news, I’d find out that the whole island was covered in wildfires that day.
Sicily was, quite literally on fire. Giusy’s expression was now reality.


—–
Sferracavallo, Palermo
Friday, June 17th
After yesterday’s heatwave and the resulting brushfires, I was grateful to wake up in Sferracavallo this morning to cooler air. The sun was bright, but not oppressive; worlds away from yesterday’s inferno. I’ve decided to stay in Sferracavallo today, instead of returning to Palermo centre for more sightseeing. You can chalk it up to a mild case of post- traumatic stress from being stranded by buses in the blaring heat. My head still feels cooked and I’d much rather stay here, where the water is closeby and I can wander around at the slowest of paces.
I suspect I’ll have no regrets.


—–
1:30pm
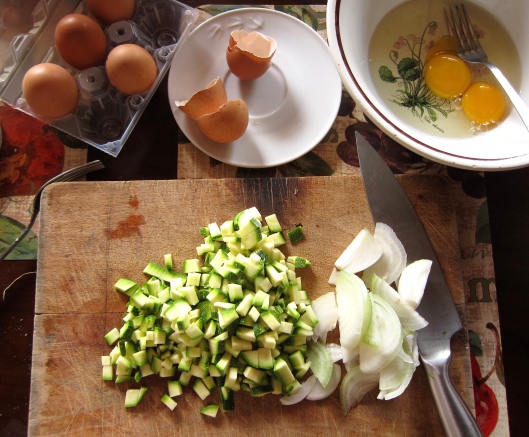
Giusy is home for lunch today. She proposes we make a pranzo di rifuti – a meal pulled together from whatever’s hanging out in the fridge. I tell her I’m fully onboard. We each get to work in a different corner of the kitchen. I start by slicing onion and zucchini for a frittata, while she combines a mixture of ground meat, pine nuts, currants and mint in a bowl to make meatballs (polpette), while a small pot of leftover tomato sauce simmers over one of the gas burners. I mix some eggs with a fork and excavate a bowl of cooked green beans from the fridge – remenants from last night’s dinner – cutting them into smaller pieces before adding them to the eggs, along with a small handful of parmesan. Instead of frying the onion in olive oil as I usually do, before adding the rest of the fritatta mixture, Giusy suggests adding them to a fry pan with the diced zucchini, but without oil, then adding just enough water to cover them. With the heat, they bubble and soften; once all the water has evaporated, we add the olive oil and then the rest of the mixture – eggs, beans, parmesan which have all been beaten into a slurry.


We unwrap some muffuletta (bread stuffed with prosciutto cotto and cheese, covered in sesame seeds) bought from the bakery that morning, cutting it into little squares before taking it outside to the rooftop terrasse with the rest of our bounty.


We eat quietly and contentedly, in the shady corner of the terrasse, looking out at the water. It feels like a dream.

—–
4pm
Since arriving in Sferracavallo, I’ve quickly fallen into a daily gelato habit. On some days, it’s a twice-daily habit, for which – to be clear – I make no apologies or excuses. I don’t see this as something transgressive. Excessive, perhaps. But then again, isn’t excess the cornerstone of all good vacations?
It’s worth pointing out (possibly to justify my new-found habit) that Sferracavallo is known to have one of the best gelaterie in this part of Sicily. According to Fabrizia, some people make the thirty-minute drive all the way from Palermo with the sole purpose of having gelato at Gelateria La Delizia. They drive to Sferracavallo, eat gelato, go home. That’s a pretty solid endorsement for ice cream if I’ve ever heard one.
Each of the gelati and sorbetti at La Delizia are made in small batches with the freshest ingredients and no addditives. I know that sounds like a TV advert, but it’s true. What they make is artisanal, in the truest sense of the word. And it’s delicious. In the short week that I’m here, I partner up as many different flavours as I can, especially the ones that are hard to come by at home – pistachio and zuppa inglese; almond and cinnamon; mulberry and lemon; prickly pear and setteveli (based on a seven-layer Sicilian cake). On one occasion, I order the brioche, a well-known specialty in Sicily. It’s basically a soft, sweet bun, halved, then stuffed with an obscene amount of gelato. I ask for one with panna and stracciatella. As the the girl behind the counter stuffs the brioche, she tells me that people sometimes eat these for breakfast. I think about all the kale smoothies North Americans have choked down in the early hours of the morning before work. I wonder if a Sicilian brioche very so often wouldn’t be such a bad thing.


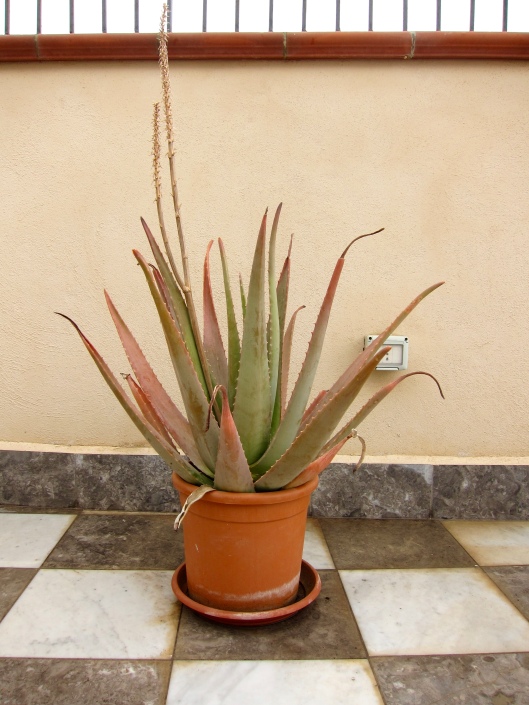
A visit to La Delizia is best followed by a long, leisurely (babbalucci-paced) walk through the streets of Sferracavallo. The town’s palette – mellow and creamy, interspersed with bursts of colours – are a little like gelato and sorbetto, mixed side-by-side, the whole thing flecked with terracotta and tile, stucco and wood, and pots of two-toned succulents.


—–
Mondello – day trip
Saturday, June 18th
12:20pm
Vendors call out “Aqua, Birra, Coca, Tè!”, trucking beverage coolers across the beach like deeply-tanned mules. Their chant is a melodic jingle; it bounces off the sand and enters your brain like an earworm, despite your best efforts to ignore it.
I’ve found a spot on a sunchair, under a parasol, at the far end of the beach. I’m pretty sure I’m supposed to pay for the luxury of sitting elevated, off the sand, but in the absence of any signs telling me so, or some inspector-type person wagging their finger at me, I’ve decided to roll with it and see how the day unfolds.
The woman beside me is layed out on a sunchair, on her cell phone, plucking stray hairs along her bikini line with her fingernails. Beside her is a boy – maybe nine or ten years old – drenched in sea water, snuggling next to his mom. Everyone is Coppertone bronzed, as only Europeans manage to do with such exquisite consistency. Even the children look like they’ve been baking for weeks – true coast kids, like the ones out of Emanuele Crialese’s Respiro. They might as well have flippers for feet.
In the parasol area there are also batches of women in their 50s and 60s grouped together on sunchairs, hunched over and smoking, chatting, slathering themselves at regular intervals with bronzing oil. Teenagers monopolise the spaces closest to the water, the boys play boomboxes and splash the girls; there are neon-coloured Speedos and glow-in-the-dark rosaries.
Mondello, my friend, is where you come to see and be seen.


In my short time here, reclining on this chair I haven’t paid for, I’ve observed that if you’re a woman – and no matter what kind of body you have – the two-piece is what you wear. Woman of all ages, shapes and sizes with tapestries of stretch marks, cellulite, soft midriffs, vericose veins, all of it completely normal and on display. It isn’t often that I’ve seen women with pillowy limbs sauntering around with such blasé confidence in a two-piece. I come from a culture that tells us – constantly – to cover up our physical imperfections and work on our quote-unquote beach bodies. It goes without saying that Italian woman are sold the same superficial, body-shaming messages as women in North America (watch any Italian variety show), but the women at Mondello beach seem to let the notion of a “beach body” roll off their perfectly-oiled backs. And it’s fantastic.
Lunchtime
The beach food at Mondello is like the beach food you’ve had anywhere else – somewhere on the spectrum of deep-fried and nutrient-free, salty and delicious. I come back from the boardwalk vendors to my little nest on the sand, with a fizzy bitter lemon drink and arancino con ragù, a deep-fried, rice ball stuffed with meat sauce, peas and mozzarella. It’s nothing fancy – the equivalent of a hot-dog and a Coke – but it’s magnificent in its own way; the kind of stuff your parents would buy on a family vacation – the bad-for-you junk that was verbotten at home, but totally acceptable on say, a roadtrip. The stuff my mom would refer to as a treat.
Today, I’m referring to this as lunch.

After a considerable stretch of time in my shady nook, under the parasol, and a few dips in the water, I leave the beach to walk along the boardwalk towards the centre of town.


It’s at this point that I remember Roberto, the grey-haired butcher I’d met on the bus from Palermo, the one who told me he worked in Mondello, “Avvicina de la sirena”.
And lo and behold, there she was, in the middle of town – the mermaid.

Behind her, I spot the tinest macelleria, squeezed between two restaurant patios. I walk in, sheepishly ask if a “Roberto” works here. A few seconds later, he emerges from the beaded curtain at the back, with his butcher-stained apron. “Giulia! Come stai?!” He’s clearly surprised to see me. I’m just as surprised that I even found him. He gives me the tour, showing me the meat selection behind the glass vitrine, all of it carefully arranged onto aluminum display trays. We chat for a bit; then, before I leave, I ask him if there’s a place in Mondello that sells good cannoli. He tells me he doesn’t really eat the stuff, but that the place across the piazza called Antico Chiosco has some. He steps out of the shop and points me in its direction, “La, a destra della sirena” (I like that la sirena is Roberto’s compass). We say goodbye and I make my way toward a building with a long green awning facing the piazza.
I order a cannolo and macchiato, served by two very serious, no-nonsense men in bow-ties with salt and pepper hair. Professional barristi. Stone-cold barristi. I carry my spoils carefully to the bus stop bench, to wait for the AMAT bus back to Sferracavallo. The cannolo’s shell – toasty, crisp and light – is the perfect vessel for the smooth ricotta filling. Unlike some of the cannoli I’ve had before, this one is subtly sweet and remarkably light, despite its obvious richness.
As you can imagine, few pleasures in life compare to eating a fresh cannolo at a bus stop in Mondello. I’ve got ricotta filling all over my fingers and powdered sugar practically up to my nose, but it might be the single happiest moment of my day. Bless you, Sicily.

—–
Sferracavallo, Palermo
Sunday, June 19th
2pm
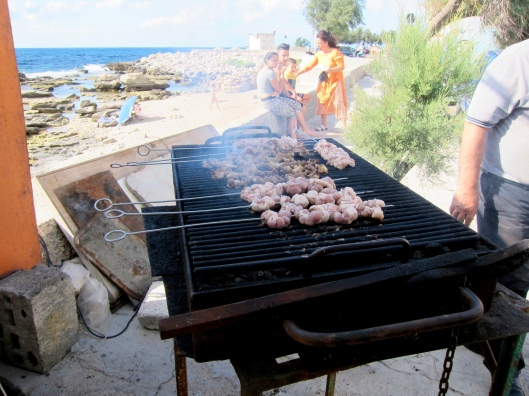
I’d seen them the day before – a handful of husky men, huddled around a barbecue along the boardwalk, knocking back bottles of Moretti. A group of comrades shouting, chuckling, exchanging insults in Sicilian dialect, of which I barely understand a word. Smoke, a deep, fiery dragon smoke billows from the grill, quickly swept away by the seaside wind. I keep my curiosity at a safe distance, watching from the other side of the street as an incognito bystander – the straniera (“foreigner”) hidden safely behind her sunglasses. They haven’t noticed me yet, but if I linger any longer, they might consider me an interloper, a loitering mouth-breather.
What are you waiting for? Go for it.
I step off the sidewalk and make a beeline for the barbecue and its makeshift vendor’s station – a wooden table outfitted with a hefty granite slab for prepping and serving, with pieces of green and blue tarp (the kind you use for camping) draped behind it like a wall, to cut the wind. As I get closer, I can finally see what it is – glossy, pink intestine. I have no clue what animal it comes from, though that question seems irrelevant now.

I get close to the counter, locking eyes with the barbecue man: “Questo è solo per locali? O posso provare?”, asking if I can have some. My request is met with equal parts confusion and reservation. I suspect he’s thinks I’m a bit of a naive kook, wondering why I’m not eating at the boojie seafood restaurants looking over the sea, like the rest of the turisti. The word “straniera”, that has been in big, bold imaginary letters on my forehead since arriving in Italy, are now glowing neon bright. I press further. “Posso?”, I ask, pointing to the coils of skewered meat, spitting and sizzling over the grill. The vendor shrugs, “Se vuole”, before adding, “Due Euros.”
As I reach for some change in my pocket, an older, mustachioed man – whose name I never asked – comes up behind me and waves off the vendors request for money. “Lo pago io per Lei“. He’s paying, apparently. He pours me some beer into a plastic cup and orders us a plate. At first I insist on paying my part, but he shakes his head, “No, no, no…è il mio piacere, signorina“. Eventually, I acquiesce. “Grazie, signore.” We clink our plastic cups together, along with those of his nearby friends. “Salute.”
While we sip our beer, I tell him about my street food experience in Palermo – about the frittola, the musso, the babbalucci. He can’t believe I ate the frittola, telling me I must have a cast-iron stomach. We’re within earshot of the BBQ man, whose ears seem to perk up at this. It is the first indication that I’m legit – that I know this is organ meat and that I’m not some dewy-eyed romantic looking for an Eat, Pray, Love experience. I just want some barbecue, BBQ man. And with that, the tension between us starts to melt. I ask him what animal it’s from “Maiale? Agnello?“. “No, è vitello” (veal). He explains that it comes from a nearby farm owned by his mother, which he and his son (pictured above) prepare for passerbys, whenever it’s available. He doesn’t dress them in anything before placing them onto the barbecue; they cook over the coals, unembellished. “Puro. Naturale.“, he says, explaining that he can do it this way because they’re so fresh. The fat around them keeps them nice and insulated, preventing them from sticking to the grill.
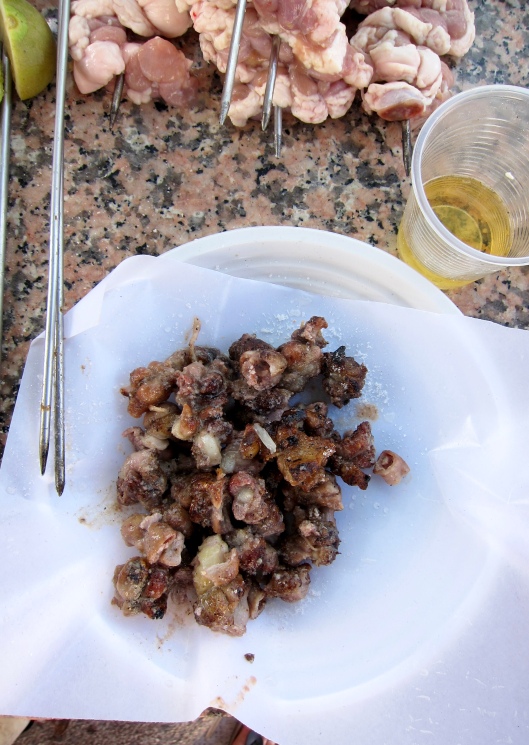
We keep chatting as he plucks one of the skewers off the grill and slides the seared pieces onto a chopping block, cutting it up into smaller chunks before piling them onto a plate lined with parchment paper. My dining companion, Mr. Mustachio, dresses our plate with salt and a squeeze of lemon juice. (I’ve heard that the latter is used in a lot of Sicilian street food, both for flavour and for microbe-killing properties.) We dig in. The pieces are chewy, but crispy and caramelised in that way that can only be achieved with a hot barbecue grill. The flavour is rich and smoky – a bit like a well-seared steak, with flavours of blood pudding and liver hanging out faintly in the background. “È buono“, I tell my companion. He seems happy that I like it. “Ti piace? Ah, bene!”
BBQ man smiles for the first time since I arrived, and it feels like a small triumph.


When there’s nothing left on the plate but a little pool of lemon juice and grease, I scrub my hands with a napkin and tell them I have to get going. They tell me to come back in a couple of days for another round; I tell them it’s my last day in Sferracavallo. “Oh, no, vero?” “Sì, sì. Devo partire domani mattina.” BBQ man asks me what time I’m leaving. I ask him why. He says, “Potrei accompagnarti“, telling me that he could drive me to the airport in Palermo, since he has to go into town tomorrow. I can’t believe what I’m hearing, considering that a mere thirty minutes ago I thought I was persona non grata. Our brief relationship seems to have done a 180. I also can’t believe how scary a prospect that is (solo female traveller getting into a car with a stranger? Can you hear the alarm bells ringing?), and so I of course decline, but thank him for the offer, and the expertly-cooked street meat. My dining companion, for his part, gives me a farewell pat on the shoulder and a handshake. “Arriverci, signorina. Buon viaggio.” I wave to his friends, who are now perched on chairs on the opposite side of the street, in the shade. They wave back, “Ciao, ciao!“, before returning to their beers.
And with that chance encounter, at a nomadic barbecue on the boardwalk that forced me be bolder than usual, I leave Sferracavallo with a full belly and an even fuller heart, feeling less like a straniera than I probably ever have.
Sogni d’oro, Sferracavallo. Grazie per tutto.